
Catch and Release Tips That Give Every Fish a Fighting Chance
By Bobby Harris — Navy FMF Corpsman (2002–2010), founder of First Rise Outfitters
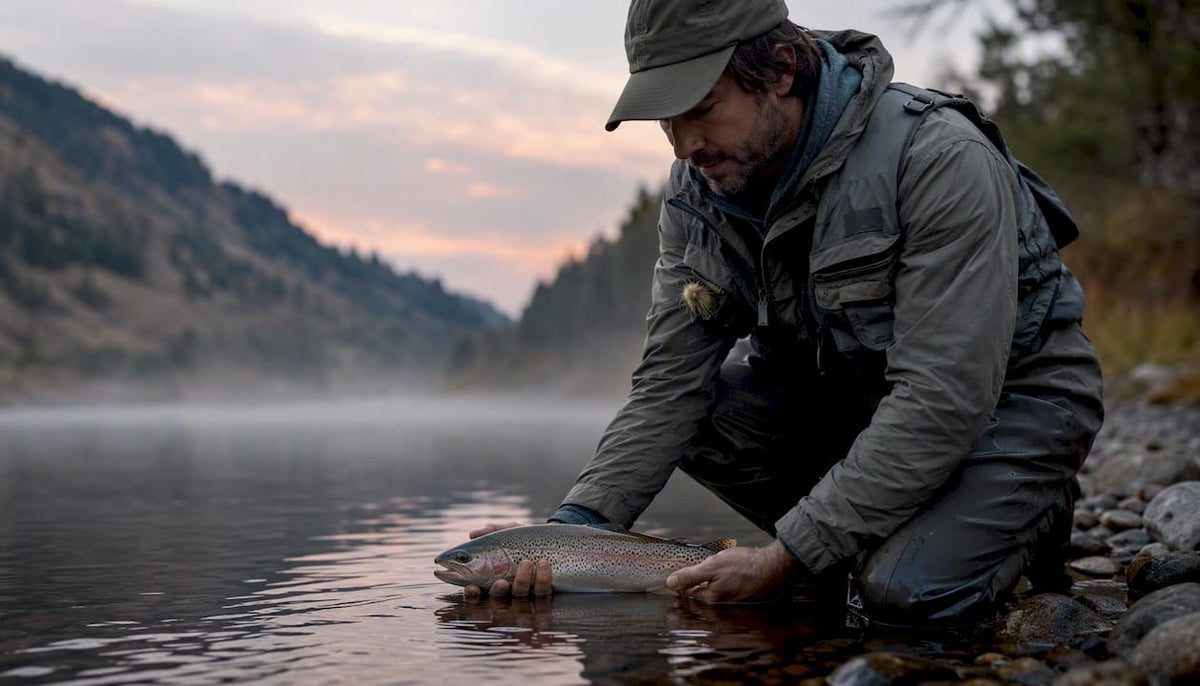
The most important catch-and-release tips come down to one rule: keep the fish in the water as long as possible. Everything else builds from there. Before you read another word, here are the five actions that matter most on the water right now:
- Keep the fish wet. Hold it in the water from the moment it’s landed until it swims away on its own.
- Limit air exposure to no longer than you can hold your own breath. State agencies recommend keeping air exposure very brief.
- Use barbless hooks or flatten your barbs. A quick squeeze with pliers before you cast saves minutes of handling time at the net.
- Land fish quickly. Use tackle that’s strong enough to end the fight fast, not light gear that drags it out.
- Cut the line if the hook is deep. Forcing out a swallowed hook does more damage than leaving it.
Pro Tip: For photos, skip the hero shot. Snap your picture while the fish is still resting in a rubber net, partially submerged. You get the shot, the fish barely notices.
Key Takeaways
Proper catch-and-release technique requires keeping fish wet, limiting air exposure to under 60 seconds, using barbless hooks, landing fish quickly, and resuscitating exhausted fish facing into current before release.
| Point | Details |
|---|---|
| Limit air exposure | Keep fish out of water for no longer than you can hold your breath, ideally under 60 seconds. |
| Use barbless hooks | Crimp barbs before fishing to cut handling time and reduce mouth tissue damage. |
| Protect the slime coat | Wet hands and rubber or knotless nets preserve the fish’s primary immune defense. |
| Resuscitate facing current | Hold fish upright into the current and only release when it swims away forcefully. |
| Know when not to release | In warm water, low-oxygen conditions, or with severely injured fish, keeping the fish may be the better choice. |
Table of Contents
- Why catch-and-release fishing matters for conservation
- Core catch-and-release tips: gear, landing, handling, and hook removal
- How to revive and release an exhausted fish
- Recognizing and handling barotrauma in deep-caught fish
- When standard catch-and-release isn’t enough
- Your catch-and-release kit: what to carry every time
- Common catch-and-release mistakes and how to fix them
- Why these practices actually work: the science behind the rules
- An honest field note on getting it right
- Gear up and give back
- Sources
Why catch-and-release fishing matters for conservation
Catch-and-release is exactly what it sounds like: you land a fish, handle it carefully, and return it alive. The goal isn’t just to feel good about it. Done right, it keeps fish populations healthy, protects trophy-sized fish that took years to grow, and preserves the fisheries that make a river worth waking up at 4 AM for.
NOAA Fisheries, the National Park Service, and state fish and wildlife agencies across the country all treat proper catch-and-release technique as standard practice, not optional etiquette. The difference between a fish that swims away strong and one that dies an hour later often comes down to 30 seconds of handling.
Core catch-and-release tips: gear, landing, handling, and hook removal
Getting the technique right starts before you ever make a cast. The gear you choose and the habits you build on the water determine how much stress a fish experiences from hook-set to release.
Choose gear that works for the fish, not against it
Tackle strength matters more than most anglers realize. Light tackle is fun, but a long, exhausting fight on 4-pound test does real damage. Use gear that’s appropriately powered for the species you’re targeting so you can land fish quickly.
Hooks are where you can make the single biggest improvement with the least effort. Switch to single, barbless hooks or use needle-nose pliers to crimp down the barb before you fish. Barbless hooks slide out in seconds, often without touching the fish at all. If you’re fishing lures with treble hooks, swap them for single barbless alternatives. You’ll lose fewer fish than you expect, and you’ll release the ones you catch in far better shape. For more on keeping hook points sharp and managing barbs, this guide on hook maintenance is worth a read.
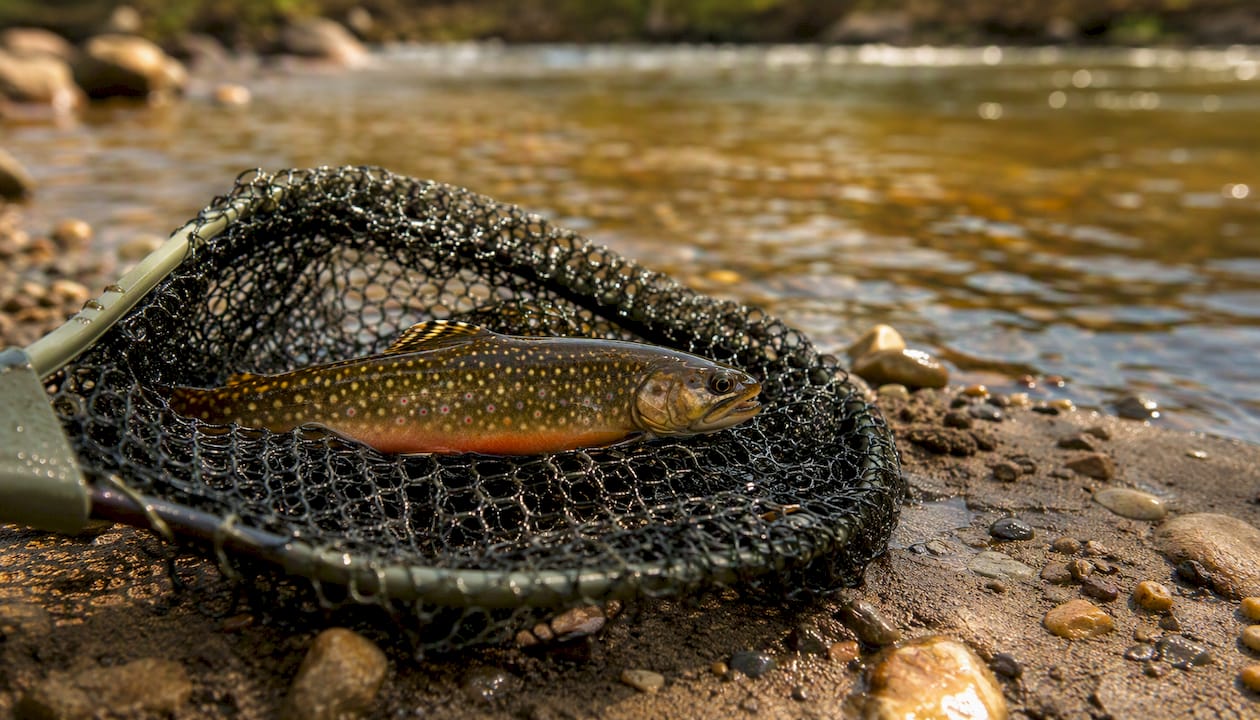
Nets are not all equal. Abrasive knotted nylon nets are one of the most common causes of slime-coat damage, and most anglers don’t realize it. Use a rubber or knotless net instead. The material matters as much as the act of netting the fish.
Land fish quickly and handle them right
Once the fish is in the net, your clock starts. Wet your hands before you touch it. Dry hands strip the protective mucus layer that acts as the fish’s immune system. If you have soft, wet handling gloves, even better.
Support larger fish horizontally with two hands, one under the belly and one near the tail. Never hold a big fish vertically by the jaw alone; the weight of its body can damage internal organs. Keep it over water at all times so that if it slips, it drops back into the river, not onto rocks or a boat deck.
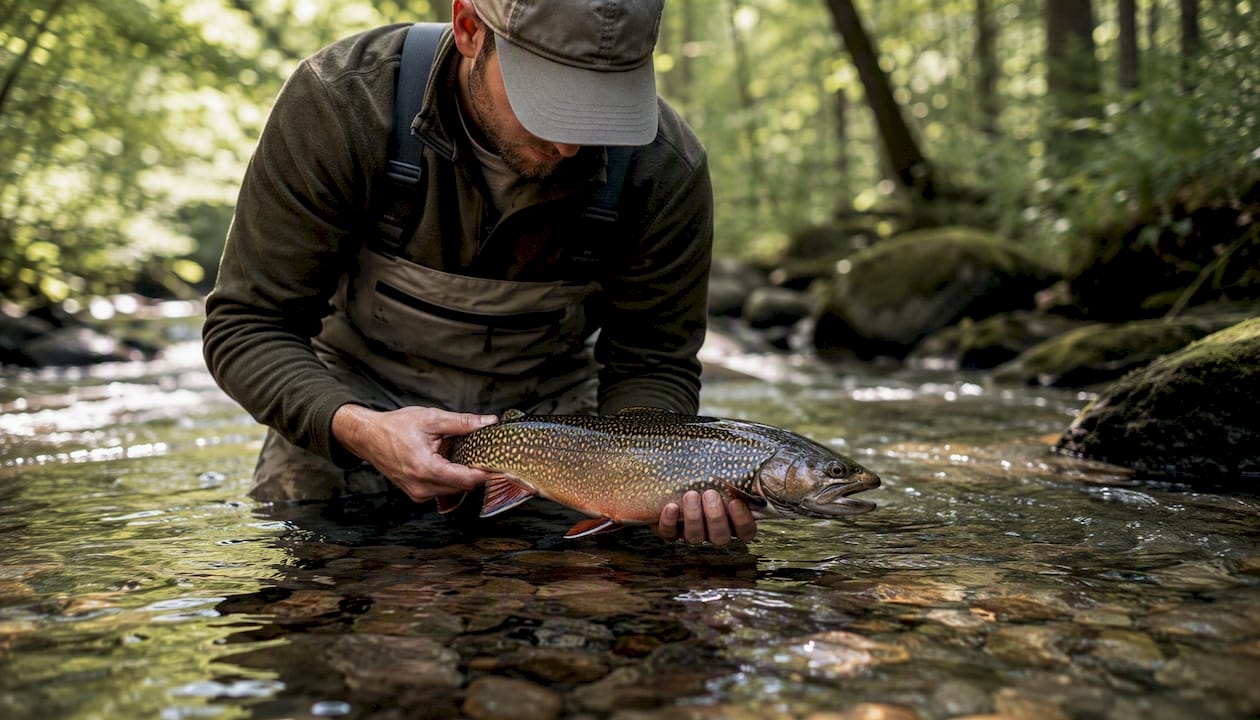
Avoid the gill plates and eyes entirely. Those areas are fragile and critical to survival.
Equipment checklist for landing and handling:
- Needle-nose pliers or hemostats
- Line cutters or wire snips
- Single barbless hooks (or pliers to flatten barbs)
- Rubber or knotless landing net
- Soft wet gloves or a wet rag
- Descending device (for deep-water fishing)
- Phone or camera in a waterproof case
Removing the hook safely
The fastest hook removal is the best one. Texas Parks and Wildlife recommends keeping the fish in the water whenever possible and using a tool to remove the hook rather than your fingers. Hemostats or needle-nose pliers give you the grip and angle you need without forcing you to squeeze the fish.
For lure fishing with single hooks, a quick twist with pliers usually does it. For bait fishing where a fish has swallowed the hook, don’t dig for it. Cut the line as close to the hook eye as possible. Embedded hooks often dissolve on their own, and the fish has a far better chance of surviving a dissolved hook than a forcibly extracted one.
Pro Tip: Pre-rig your pliers or hemostats on a retractor clip attached to your vest or pack. When you need them, they’re already in your hand. Every second you spend searching your bag is a second the fish spends out of water.
For fly fishing scenarios with small trout, you can often back the hook out with two fingers while the fish rests in the net in the water. For larger bass or walleye with deeper hook sets, pliers are non-negotiable.
How to revive and release an exhausted fish
Some fish come to the net ready to bolt. Others are spent and need a few minutes of help before they’re ready to go. Knowing the difference, and knowing what to do about it, is one of the most underrated catch-and-release techniques.
Follow these steps when a fish needs resuscitation:
- Hold the fish upright in the water, supporting its mid-body with one hand and its tail with the other.
- Face it into the current if you’re in a river. Moving water flows through the gills and delivers oxygen. In still water, gently move the fish forward and back in a slow rocking motion to push water over the gills.
- Watch the gills. Active gill movement is a good sign. A fish that’s barely moving its gills needs more time.
- Wait for a strong kick. Only open your hands when the fish pushes away with real force. A fish that drifts away slowly is not ready.
- Don’t move the fish backward. Pulling a fish tail-first through the water forces water the wrong way through the gills and can cause additional stress.
For a trout in a cold, fast river, recovery often takes 30 seconds to two minutes. A bass in a warm, shallow pond on a July afternoon may need considerably longer, and may not recover fully at all if the water temperature is too high.
Pro Tip: If a fish hasn’t recovered after several minutes of active resuscitation, consider whether the conditions are simply too warm or the fish too exhausted. In some cases, the most humane choice is to keep it rather than release it to a slow death. Check your local regulations first.
Recognizing and handling barotrauma in deep-caught fish
Barotrauma happens when a fish is pulled up from depth quickly. The gases inside its body expand as pressure drops, and the result can be a fish that floats on its side, has a distended belly, or has its stomach protruding from its mouth. NOAA Fisheries notes that effects often begin at depths around 30 feet and become more severe the deeper the fish was caught.
A fish with barotrauma cannot swim back down on its own. Releasing it at the surface is essentially a death sentence. The solution is a descending device, a weighted tool that carries the fish back down to depth so pressure can recompress the gases and allow recovery. Several designs are available, and this overview of fish release devices covers practical options worth considering.
Venting (puncturing the swim bladder with a hollow needle) is another method, but it requires training, the right tool, and in some states, specific regulatory approval. If you’re not trained and equipped for venting, use a descending device instead.
The simplest prevention strategy: if you’re planning to release fish, avoid fishing at extreme depths. Targeting shallower water or adjusting your presentation to stay above the barotrauma threshold is often the most effective approach.
When standard catch-and-release isn’t enough
There are conditions where even perfect technique can’t save a fish. Knowing when to adjust your approach is part of being a responsible angler.
High-risk situations to watch for:
- Warm surface temperatures. When water temps climb into the upper 60s°F for trout or the mid-80s°F for bass, post-release survival drops sharply. Wyoming Game and Fish advises prioritizing very quick releases and fishing during cooler morning or evening hours in summer. For early-morning fishing strategies that help you beat the heat, this guide to dawn fishing covers the timing well.
- Low dissolved oxygen. Stagnant ponds and slow backwaters in summer can have oxygen levels too low for fish to recover from the stress of being caught.
- Spawning periods. Some species are particularly vulnerable during spawn. Check your state fish and wildlife agency’s guidance for species-specific timing.
- Severely injured fish. A fish that’s bleeding heavily from the gills, deeply gut-hooked, or showing signs of extreme barotrauma may not survive regardless of how carefully you handle it.
When conditions are high-risk, your options are: fish during cooler parts of the day, move to deeper or cooler water, take in-water measurements instead of lifting the fish for length, or keep the fish if regulations allow and conditions make release unlikely to succeed. For warm-season fishing, these warm-weather fish care tips offer practical seasonal guidance.
Your catch-and-release kit: what to carry every time
You don’t need a tackle shop’s worth of gear. You need the right seven items, ready to use the moment a fish is in the net.
- Needle-nose pliers or hemostats. For hook removal in and out of the water. Keep them on a retractor lanyard so they’re always within reach.
- Line cutters or wire snips. For cutting line close to a deeply swallowed hook. A small pair clipped to your vest works perfectly.
- Single barbless hooks or pliers to flatten barbs. Prep this before you fish, not after you’ve landed something.
- Rubber or knotless landing net. The net material protects the slime coat. A knotted nylon net is the wrong tool for a fish you plan to release.
- Soft wet gloves or a wet rag. Wet hands are the minimum. Gloves give you a better grip without the pressure of bare fingers.
- Descending device. If you’re fishing deeper water for species prone to barotrauma, this belongs in your bag.
- Phone or camera in a waterproof case. For quick in-net photos without lifting the fish out of the water.
For a broader look at how gear choices affect your time on the water, the marsh fishing gear guide covers rigging and kit selection in useful detail.
Common catch-and-release mistakes and how to fix them
Most post-release mortality comes from a handful of avoidable errors. Here’s what to watch for and what to do instead.
- Playing fish to exhaustion. Using tackle that’s too light for the species extends the fight and depletes the fish’s energy reserves. The National Park Service is clear: land fish as quickly as practical. Use appropriately powered gear.
- Dry-hand handling. Dry hands pull off the slime coat. Wet your hands in the water before you touch the fish, every single time.
- Using abrasive nets. Knotted nylon nets scrape scales and strip mucus. Switch to rubber or knotless mesh.
- Trying to remove a deeply swallowed hook. Digging for a hook that’s past the throat does more damage than the hook itself. Cut the line close to the hook eye and let the fish go.
- Prolonged air exposure for photos. The “hold your breath” rule from the Wisconsin DNR is the simplest benchmark: if you can’t hold your breath anymore, the fish has been out too long. Shoot your photo in the net, in the water.
- Holding fish vertically by the jaw. Fine for small bass, damaging for larger fish. Support the body horizontally.
- Releasing a fish before it’s ready. A fish that drifts away slowly is not recovered. Hold it until it kicks away on its own.
Why these practices actually work: the science behind the rules
The recommendations above aren’t arbitrary. Each one targets a specific biological vulnerability.
The slime coat is a fish’s first line of immune defense. It’s a thin mucus layer that protects against bacteria, parasites, and infection. Arkansas Game and Fish Commission explains that wet hands, rubber nets, and minimal handling preserve this layer. Dry hands or abrasive nets strip it away, and the fish may die from infection days after release, long after you’ve assumed it was fine.
Exhaustion depletes lactic acid buffers in muscle tissue. A fish that’s been fought to the point of rolling on its side has used up the reserves it needs to recover. That’s why tackle choice and fight time are conservation issues, not just sporting ones.
Water temperature and oxygen work together. Cold, well-oxygenated water gives an exhausted fish the best chance of a fast recovery. Warm water holds less dissolved oxygen and slows the metabolic processes the fish needs to bounce back. A trout in 75°F water is already stressed before you’ve touched it.
| Cause | Effect on fish | What you do |
|---|---|---|
| Air exposure over 60 seconds | Elevated mortality risk | Keep fish in water; photo in-net |
| Dry hands or abrasive net | Slime coat damage, infection risk | Wet hands; rubber or knotless net |
| Long fight on light tackle | Exhaustion, lactic acid buildup | Use appropriately powered gear |
| Warm, low-oxygen water | Slow or failed recovery | Fish early/late; consider keeping fish |
| Barotrauma from depth | Fish can’t descend; surface mortality | Use descending device |
An honest field note on getting it right
There’s a moment every angler knows: you’ve just landed something worth photographing, and the instinct is to lift it up, hold it high, and get the shot. I’ve been there. The fish is beautiful, the light is good, and you want to remember it.
What I’ve learned to do instead is leave the fish in the net, hold the net just at the surface, and take the photo from above. It takes about five seconds. The fish barely registers what happened. And when I open the net, it’s gone before I’ve put my phone away.
That shift, from hero shot to in-net photo, is the single easiest change most anglers can make. It costs you nothing and gives the fish everything.
At Firstriseoutfitters, conservation isn’t a tagline. It’s the reason the brand exists. The Trout Heritage collection is built around the species worth protecting: brook, brown, rainbow, and cutthroat trout, hand-designed on garment-dyed tees that look like they belong on the water at dawn. If you care about the fish, you probably care about what you wear when you’re chasing them.
Gear up and give back

If you’re the kind of angler who’s up before sunrise and back at the truck before most people have had coffee, Firstriseoutfitters makes shirts for you. The Brook Trout Fishing T-Shirt features hand-designed artwork on a garment-dyed Comfort Colors blank, in muted tones that look right on a tailgate or a trailhead. No loud logos. Just a well-made shirt that says something about where you’d rather be.
Sources
These official resources cover local rules, species-specific guidance, and deeper how-to detail for catch-and-release fishing across the United States.
- Catch and Release Fishing Best Practices | NOAA Fisheries
- Catch & Release Safely (U.S. National Park Service)
- Responsible catch and release | Fishing Wisconsin | Wisconsin DNR
- Catch & Release Tips - Texas Parks and Wildlife
- Responsible catch-and-release tips for trout anglers • Arkansas Game & Fish Commission
- Gordon, what is the best way release a trout? | Wyoming Game & Fish Department